27 April 2013

I won something wonderful!

I entered a giveaway on the Gingermelon Dolls blog and I won one of Shelly's gorgeous new patterns...


They are all too adorable but I think I am going to make the bunny first with the cute little orange dress.

You can find this pattern in Gingermelon's Etsy store along with hundreds (yes hundreds) of other gorgeous patterns like this one...

Fairy Tale Dolls pdf Patterns - You Choose Two
Look at Little Red Riding Hood and Snow White.....devine!

Be sure to like the Gingermelon facebook page and keep an eye out for more giveaways which Shelly has all the time. She has 8021 likes! Eeeek puts my 78 likes to huge shame.

22 April 2013

Now you can download Cupcake Cutie patterns instantly!

I love a bit of instant gratification so I am so excited that Etsy now offer instant digital downloads!

That means that when you buy a Cupcake Cutie pattern from my Etsy store you just click the button and there is your file all ready to print. No waiting by your inbox for the pattern to arrive, you can start stitching straight away!

The one problem with this Etsy innovation is that I am probably 10 times more likely to being buying instant patterns and printables...hmmmmm dangerous.

15 April 2013

Bunny Sweatshirt project finished!

I am trying really hard to finish some projects and it is not as hard as I thought. I have just finished stitching this gorgeous bunny on my daughter's size one sweatshirt....

...the pattern is of course from one of my favourite Ondori cross stitch books. Here she is close up...
I just used a piece of scrap waste canvas, pinned it in the middle and used an oval embroidery hoop to keep it in place...
......carefully counted to find the middle of the bunny pattern and started stitching. I just kept moving the hoop around to suit which part I was stitching until I was finished...
 
......then I removed the hoop and the fun began. You are supposed to immerse it all in water to release the waste canvas but it gets messy and yucky and sometimes colours run so I prefer just to remove it strand by strand. It takes a bit of care and patience but it is lots of fun too...
 
No I am seriously considering stitching one in my size!

Question is when are you too old to be wearing a cute picture on your sweater?

10 April 2013

THE FORGOTTEN GIVEAWAY WINNERS!

Near the end of February I promised to giveaway one of my new patterns and of course I totally forgot all about it! Please feel free to remind me of these things in the future!

I decided to give away two patterns and the randomly drawn winners are Lori and Jeanette.

Congratulations ladies.

Lori I have your email and will email your Gnome pattern soon.

Jeanette can you please let me know your email address and then I can get Miss Riding hood to you ASAP!

Thanks to everyone who took the time to enter and your patience in waiting for the winners!

09 April 2013

A felt food picnic

So I have finally finished the felt food feast for my son's third birthday which is in five days. I didn't quite get everything done that I wanted to but there is more than enough for a three year to get excited about.


The original plan was to fill this picnic basket...
...which I have cleaned up and added gorgeous oilcloth to the line the bottom of it.

The idea was that I was when we wanted to go on a real picnic we would empty it of his play food and be set to go. It is really huge and heavy though, even the lid and I could just see him shutting his baby sister in there so we now have plan B.....

The Retro Bread bin!....
...this has been in the shed for a while as I have no bench space for it so I was cleaning it up to sell it when Oliver decided he wanted it to put his toys in. So I thought perfect I will fill it with his picnic stuff. So here is what you can fit into a bread bin....

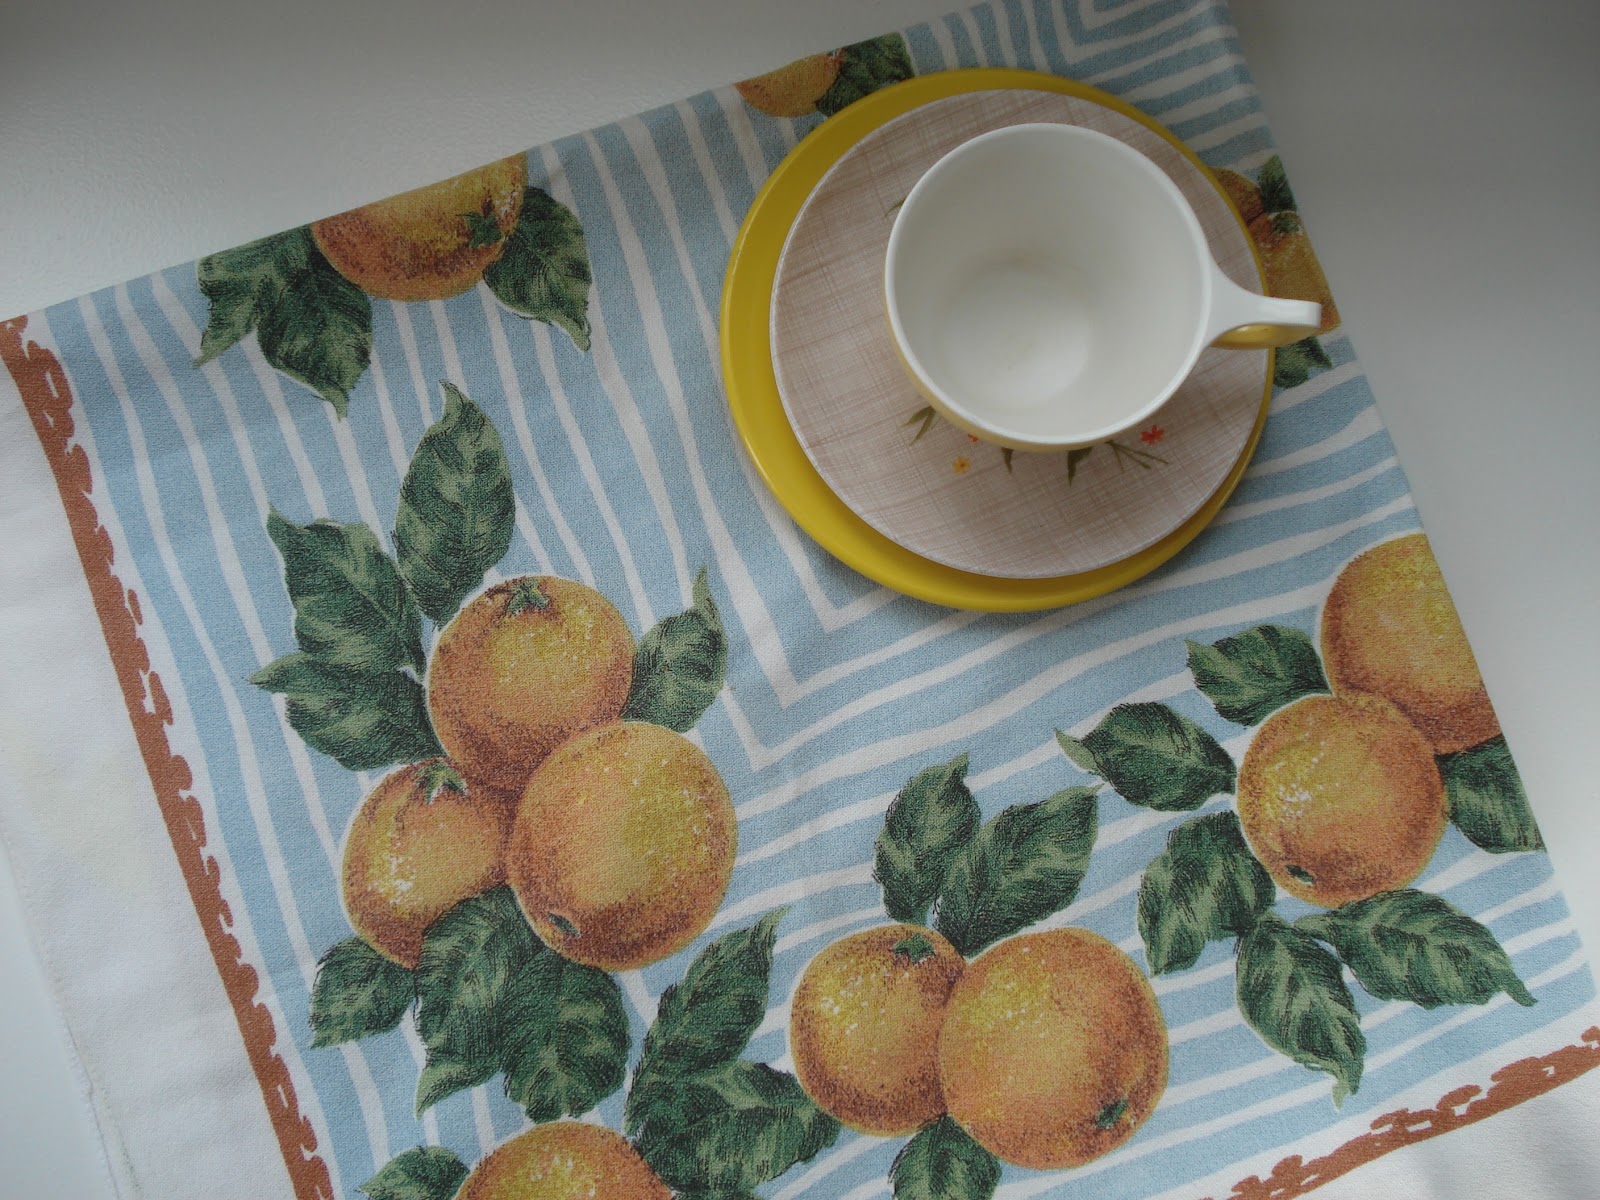
1 x retro tablecloth.....

Assorted vintage duraware cups, saucers and plates + a few laminated doilies...

1 x vintage biscuit tin.....

...filled with felt cupcakes, biscuits and a bun! And a felt liner that took me 2 weeks to make (sorry there won't be a tutorial for this one!)

Here they all are out of the tin...Yum!
I will be posting tutorials for the biscuits and cupcakes in the next few weeks as I promised to make a set for my Son's preschool so I will take photos as I go.

I have also added all the felt food tutorials to a new page on my blog so take a look.

I have made the cupcake cases removeable so you can mix and match!

2 x donuts (find the tutorial here)...

1 x retro orange container to hold the...

.....4 x felt tea bags (find tutorial here).....
...and the 2 donuts fit perfectly on top for storage!

1 x gorgeous hand stitched sandwich bag......
...which holds a felt sandwich perfectly!

You can find the sandwich tutorial here.

Assorted vintage plastic fruit and vegetables that looks incredibly real! I was going to make felt fruit but ran out of time so I was glad to stumble upon these at the op shop and happy to pay $5.

And here it all is squished into the bread bin...
 
....but it looks far better all on display...


I can't wait to have some pretend pininc especially as Summer is definitely on its way out and I will be looking for things to entertain the kiddies over winter.

Only 5 more sleeps until my boy turns 3. I can't wait for him to open this, hopefully I will remember to have the camera close by to record his glee!

05 April 2013

Instagram has landed!

Yes I know I am about 2 years behind everyone else but I am now Instagramming (possibly a word?)You can follow me here or you can see my pics on the right handside of my blog.

I will be posting photos of my works in progress/craft project of the day/general creative mess(!), op shop finds, home/garden makeover progress etc.

So come and follow me....pretty please?!

The Playhouse Makeover

I finished the kid's playhouse makeover about a month ago and am finally getting around to blogging about it.

All the bits and pieces (except for the plastic kitchen) I collected from op shops or the $2 shop. It was never going to be a 'designer' playhouse, I just wanted to brighten it up, make it warm and welcoming and really it was just an excuse for me to get creative.

This is the outside.....

......which isn't going to change as I like the rustic look, it blends in well with the garden and I like how it looks like a trampers hut!

The inside BEFORE...
......horribly dirty with a few random stickers.

I rummaged in our shed and came up with some textured wallpaper and interior paint left over from our last house. I slapped on coats of paint during kids nap times and hubby helped with the wallpapering.

I painted a mural on one wall...


.........I like how when you open the door 'Miss Bunny' is there to greet you.....

....and of course I had to add a hedgehog. It was so much fun painting again, I haven't done any for years.

Next I decided to move the kid's existing kitchen into the playhouse so needed a splash back and fancied a retro tiled look....
.....so I went straight to Kitschy Digitals and found this fabulous set of 'Retro Checks' digital paper from Alice Apple. I printed them off, cut them into squares and modpodged them to the wall.

I added a retro spice rack found for $1 at a local garage sale and a pattern I did about 10 years ago.
I put up a $2 clip board, which I decorated with washi tape, for my son to hang up his latest work of art.
I found an old picture frame and attached it to the wall with liquid nails, then painted it with chalkboard paint. The old wooden letter holder is to hold the chalk (it was $1).

I added a 'faux bois' (fake wood) floor (Martha Stewart would be proud) and a black doily mat which is also a chalkboard.
....the curtains are a $1.50 tablecloth that I chopped in half and lined with some green lining I had inherited from somewhere. The curtains are tied back with blue/white polka dot ribbon.

The ceiling was looking a little bare and I was going to sew some bunting but then I remembered I had seen some free printable bunting on the Kitschy Digital Freebies page (you must take a look there are fabulous free printables and embroidery patterns) and thought that would be much quicker.

I didn't measure or space anything out, I just 'eyeballed' it and modpodged them up in one nap time. That's how I measure my craft projects these days....'can it be done in a nap time'!
I love the bunting, it is one of my favourite parts of the makeover...although my neck has not quite been the same since....
 
So there you have it! It is definitely one large tick off my works in progress list.